Support
Cleaning Your Range
Below are our recommendations for cleaning your Lacanche range.
Please note: Before any cleaning work, close the gas supply and/or isolate from the main electrical supply.

Stainless Steel
- All stainless steel parts should be cleaned regularly with hot, soapy water or any other neutral, non-abrasive detergent at the end of each cooling period.
- Wipe up any spills immediately.
- When soapy water will not do the job, special-purpose products made just for stainless steel can be purchased at your local hardware store or kitchen store.
- Do not use steel wool pads, abrasive cloths, abrasive cleaners, or powders to clean. Do not use a metal knife, spatula, or any other metal tool to scrape stainless steel. Scratches are almost impossible to remove.
- Do not permit citrus or tomato juice or forms of brine (concentrations of salt, sauerkraut, etc.) to remain on the stainless steel surface, as citric acid or anything acidic will cause corrosion (pitting) and permanently discolor stainless steel.
Caution: Do NOT use any chlorinated cleansers (bleach of any kind) or ammonia to clean the stainless steel, as it will permanently discolor stainless steel.
Ovens
A standard oven cleaner can be used in any Lacanche oven.
CAUTION: Do not use abrasive cleaners on the oven walls. Special oven cleaning products (such as SprayWay Grill & Oven Cleaner) may be used but should be kept away from the electrical elements, thermal probes, rubber gaskets/seals, and hinges. You may remove the oven door gasket when using any oven cleaning products. Be sure to remove all residues from surfaces after using any cleaning products.
Clean the rear cover(s) (electric oven or fan-assisted oven) to ensure that the cooling louvers are not blocked with deposits. Do not spray cleaner directly onto the louvers in the rear cover, as the product may splatter onto the back wall. Instead, spray the Grill & Oven Cleaner onto a towel and wipe accordingly.”
After cleaning and before use, ensure that the base plate of the oven is properly mounted at the rear, slid forward, and fitted under the front edge of the oven to prevent deformation from heat. (The bottom base enamel panel has a slight torsional twist designed into it and will not lay flat when loose or removed. on purpose—it will be in compression when fitted properly.)
Enameled Surfaces
Use a sponge soaked in soapy water or a degreasing product applied with a soft cloth. Never use any abrasives and avoid excessive or harsh rubbing when cleaning, as this can leave permanent marks on the enamel. A gentle, non-ammonia glass cleaner can be used on the colored enamel surfaces if soap is not effective.
Caution: Do NOT allow any metal, cast iron, or brass polish/cleaners (Brasso, Copper Brite, Flitz, etc.) to come in contact with any enameled surfaces. The chemicals will cause permanent damage to the enameled finish.
Cast Iron Surfaces
Heating Plates Caution: DO NOT USE WATER TO CLEAN THE HEATING PLATE WHEN IT IS HOT. This can damage it. These are considered work surfaces and are not recommended for direct food contact.
Grates: Using a brush or cleaning pad, wash with soap and water and then dry. For more heavily soiled grates, degreaser or Bon-Ami Cleaner (non-abrasive) can be used. Avoid soaking grates in soap and water, as it may weaken the adhesive for the rubber grate feet. Avoid using a brush or cleaning pad directly on the rubber feet to ensure they do not come off during cleaning.
Grill/Griddle Plate – Cast Iron Plate with Treated Finish: Using a brush or cleaning pad, wash with soap and water and then dry. Even though these plates have a treated finish, a light “seasoning” of these cooking surfaces will make for easier cleaning and provide a good non-stick surface. However, seasoning is not required.
Brass
Newly machined brass parts will have a shine to them. However, these parts have a non-lacquered surface, so as they age and are used, they will develop a patina. Some consider this to be a very classic look and are careful to maintain this appearance. You may prefer to have a polished look to your brass parts. If so, we recommend using Mother’s Mag and Aluminum Polish.
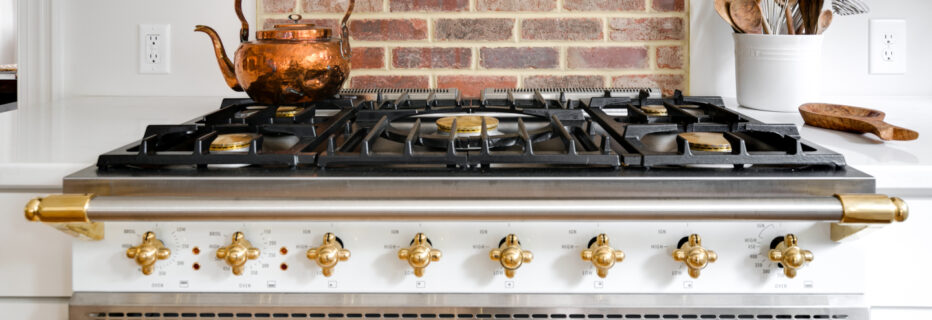
Brass Burner Caps
The brass burner caps are shiny due to the machining process. Even though the cosmetic look is appealing, brass is ultimately chosen as a material for its durability and machinability. With normal use, the brass will lose its shine, become bronzed, and develop a patina. Over-polishing the brass caps is not recommended because performance may be affected and result in burner malfunction. Simply clean with a cloth using dish soap and water. To remove heavier, baked-on grease splatter, submerge the caps with tongs into 100% boiling white vinegar for 10-15 seconds, then rinse with cool, clean water and pat dry. Once dry, you may polish the caps with Mother’s Mag & Aluminum Polish. Enameled steel burner cap covers are now available as functional cosmetic covers to help protect the brass burner caps from discoloration during use.
Brass Trim
First, clean the brass using soap and water or glass cleaner. To remove heavier tarnish, grease, or other impurities, use a metal cleaner and polish, such as Mother’s Mag & Aluminum Polish. When polishing the towel bar supports and oven door bar supports, you may use masking tape to protect the surrounding enamel.
CAUTION: When caring for brass parts, do not allow harsher polishes or cleaners to come in contact with enameled surfaces. The chemicals will cause permanent damage to the enameled finish. Mother’s Mag & Aluminum Polish will not affect the enamel.
Chrome, Nickel, Copper or Brushed Stainless Trim
These trim options are custom upgrades. If you did not order one of the above, your Lacanche has brass trim and should be cleaned accordingly (or left alone to patina).
The trim options on a range include the waist bar supports, oven door handle supports, temperature knobs, and drawer pulls. The actual towel bar and oven door bars are always stainless steel.
Wash all upgraded trim option parts with soap and water, rinse, and then dry with a soft cloth.
Burner Assembly
(Two parts – Aluminum Burner Bowl and Brass Burner Caps) The burners are made in two parts to facilitate cleaning. Clean them separately.
Aluminum Burner Bowl – For light soils, clean with dish soap, water, and a sponge. For heavy soils, use a nylon bristle brush and a product called Bon-Ami. Never use an oven cleaner on these parts or wash them in your dishwasher.
Brass Burner Caps – Using a non-metallic brush, wash with soap and water. The small holes MUST be kept clean and free of any residue, or the burner will not operate properly. Please note: The brass burner caps come to you very shiny because this is how they look after the machining process. Even though the cosmetic look of the brass is great, it is chosen for its machinability and durability. Once you start using your range, it is normal to see the brass lose its new look and develop a brownish, mottled appearance. It is not recommended to polish these caps often, as it could affect their performance and shorten their lifespan. If you wish to purchase new brass burner caps, please visit our online store.
Brass cap cleaning video: https://youtu.be/CumF3E3AWfw
La Plancha
The best way to clean your plancha will depend on what type of food was cooked on it. If the food was oily, a simple mild soap, water, and a rag or paper towel should do the trick. If you cooked something with a high fat or sugar content and there is build-up on the surface, you may need to use the provided razor scraper to remove debris prior to using soap and water.
The chrome-plated stainless steel surface is very durable, but be careful to use the scraper with a clean blade, as a dull blade with nicks or dings might scratch the surface. The best method is to clean the cooking surface while it is cooling down but still warm. The heat and water will literally steam the majority of the cooking remnants off onto a rag or paper towel. Obviously, you only want the surface warm enough to what you can personally tolerate. Be careful not to burn yourself.
Basic Steps:
- Warm up the surface to a tolerable temperature and let the remnants soften.
- If cooking remnants are crusty or have texture, you will need to scrub or scrape to remove them first.
- When ready, take mild soapy water and wipe the surface. Do this repeatedly until the surface is clean.
- A final wipe-down with fresh, clean water (only) should be performed as a last step.
- If these steps are not getting the result you desire, you may use a mild degreaser and/or a mild abrasive 3M-type scouring pad. This step should be done while the surface is cool, as the degreaser may react to the heat.